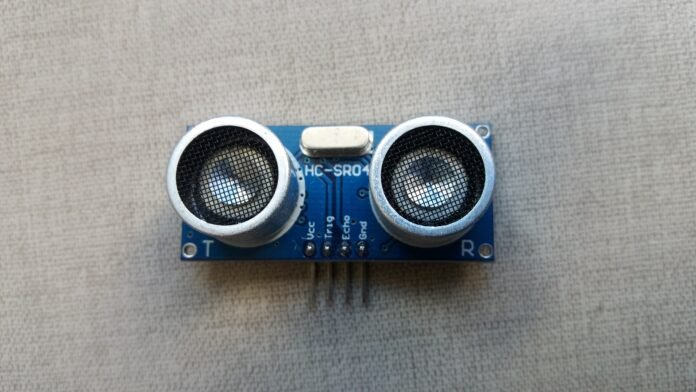
In this sixth part of Arduino tutorial, will be explained how it works and how to use the ultrasonic sensor HC-SR04. I will show some projects involving this sensor and what was seen in previous tutorial.
How it works?

Note that this sensor has two “eyes”, one to transmit the ultrasonic wave and another to receive this same wave. The transmitted ultrasound wave reflects in a object and returns to the sensor.

This sensor has 4 pins, your functions are:
- Vcc is the positive supply, which is +5V;
- Gnd is the circuit’s ground;
- Trig is the input pin, stays in HIGH level for 10 microseconds indicating the beginning of measure;
- Echo is a output pin, stays in HIGH level during the time needed to the ultrasonic signal go and back to the sensor.
After the 10 microseconds Trig signal, 8 pulses of 40 KHz are transmitted and the receiver awaits the wave`s return.
 The D distance calculated in the form below:
D=\frac{340\cdot t}{2}
340 m/s is the speed of sound in the air and t is the time to ultrasonic wave to go and back. t is also the time Echo stays in HIGH level. This ultrasonic sensor emits waves at 40 kHz, the maximum limit of sound waves perception by human ear is 20 kHz.
Using in Arduino
Now let’s see how to use it in Arduino, this is the assembled circuit. Trig linked in digital pin 5 and Echo in pin 6.

The algorithm below, this program must allow the measure of distance between the sensor and the point where the wave is reflected.
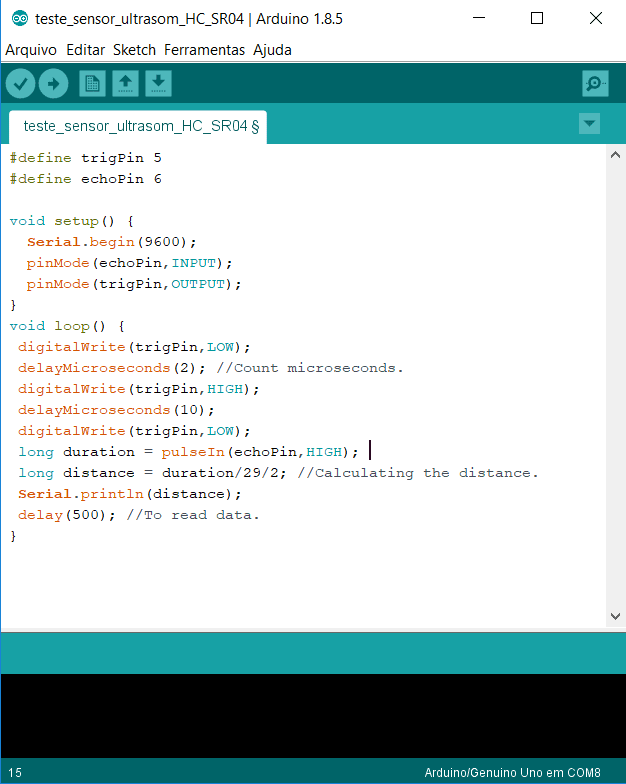
The long variable is a int which occupies 32 bits in Arduino’s memory, while the int variable occupies 16 bits.
Autonomous robot
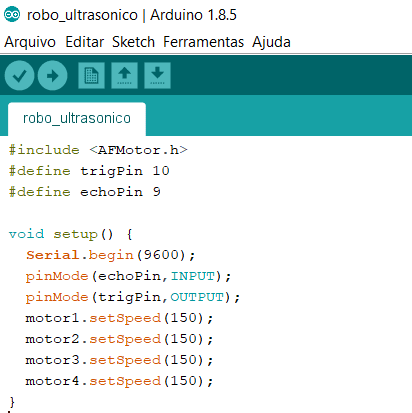
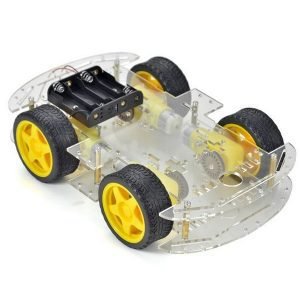
I will show a robot with ultrasonic sensor. This one uses a H bridge shield V1 from Adafruit and uses this 4 wheeled chassis model.
 Some details of the assembled robot and the program.


With this program, the robot changes direction when it finds an obstacle. The first and second part respectively.
