One more Arduino tutorial. This time, will be explained how to use the LCD display and will be shown some project examples.
Click in the buttons below to know how it works and how to build a LCD display.
LCD terminals
At the back of display, it is possible to see the pin numbers.

This is the table of LCD terminals and your functions.

Connecting the LCD in the Arduino
Now we have to connect the LCD in the Arduino board. Welded wires in display.

The display assembled in the Arduino, the potentiometer serves to regulates the contrast in the display.

This is the algorithm to show a message in the display, note that in the right side there are commentaries in “//” with explanations for each command and function. Must appear “Hello World!” in LCD.


Making some modifications in the code.

The library has the functions lcd.scrollDisplayLeft(); and lcd.scrollDisplayRight();, which allow the message to move to the left and right respectively. Need to stay inside for loops to algorithm knows how many must move the message. In this case, the message will move 12 rows to the left and after 2 seconds, 16 rows to the right. The delay(300); determine the movement speed.
Some projects
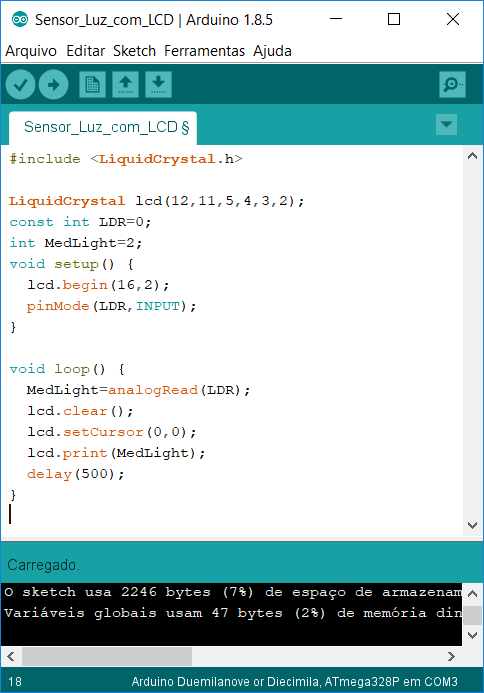
Now let’s put a LDR light sensor. In this project, the LCD display will show the measure of light intensity in the sensor.

This is the algorithm, in this project are used concepts learned in the second part of Arduino tutorial, click in this link to see the part 2. To change the position of showed value in the display, just switch the numbers in lcd.setCursor. But remember that the display has 16 rows and 2 lines.

We can build an ultrasonic ruler, which measures the distance with an ultrasound sensor. In the tutorial 6, it is showed how to use the HC-SR04 sensor in Arduino.

Here is the algorithm, the display must show the distance between the sensor and an obstacle in centimeters.


